
Craft Tutorial: Photo Lanterns
Ready for a fun project? This is one of those craft tutorials that you can imagine doing because it’s fun and festive but also practical and timely with warmer days here. The uber creative Livy Kanaley from a new favorite blog of mine, A Field Journal, is visiting us to share a craft tutorial — how to make a festive photo lantern with battery operated tea lights. I love sharing random projects like this from time to time on decor8 especially with so many looking for projects that are affordable and not overly time consuming. This project is creative, easy, and something you can actually use. Imagine these lanterns on your patio or even at a wedding… lovely!
Ready to learn how to make these? Livy, the stage is yours!
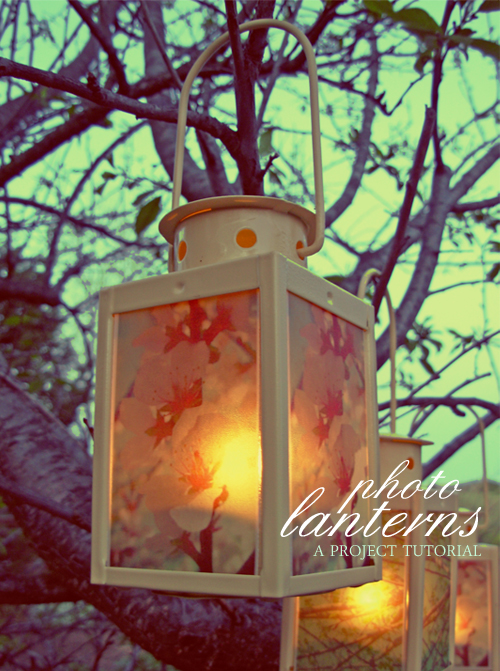
“These lanterns are adaptable to any occasion and perfect for the warm weather that’s just around the corner. The photos you select can be anything - old family snapshots would be of interest at a reunion for example, or you could play it simple and just use text - a favorite quote, a significant date, or a festive message.” -Livy
Materials:
- Store bought lanterns (glass votives are an alternative)
- Spray adhesive (suitable for paper and glass)
- Vellum
- Digital images
- Printer
- Battery operated tea lights
- Scissors/Paper cutter
 Instructions:
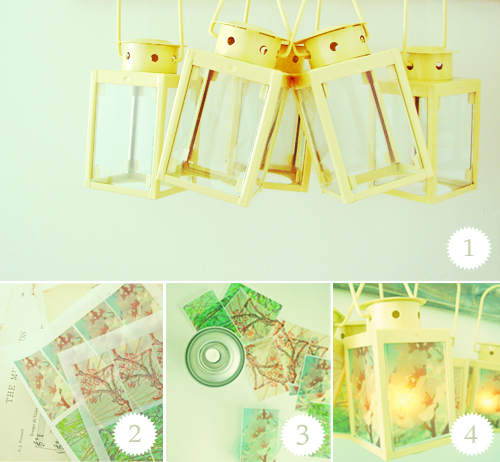
- Step #1: Carefully remove glass from store bought lanterns. (You may want to wear gloves.) Alternatively, cylindrical glass votives could be used, just be sure that whatever vessel you select has straight sides so the vellum will adhere smoothly.
- Step #2: Measure the surface to be covered, and print appropriately sized images on 8.5 x 11 sheets of vellum.
- Step #3: Using scissors or a paper cutter, cut out each image. Coat glass with spray adhesive and immediately apply vellum. Let dry.
- Step #4: Replace glass in lanterns, add a battery operated tea light and enjoy!

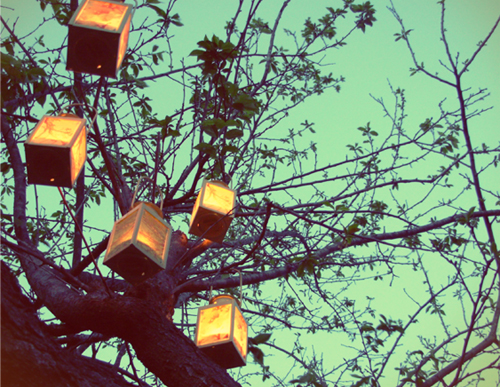
I hope that you enjoy creating your very own Springtime lanterns… I definitely want to try this project myself! If you end up making your own and have photos to share, please send me ONE photo so I can check it out — maybe I’ll feature it on decor8. :) I love a little show ‘n tell time!
Important safety note: Remember everyone - use only BATTERY OPERATED TEA LIGHTS. I don’t want anyone to burn down their yard or home.
(images from Olivia Kanaley)