
DIY: Liberty Flower Napkin Rings
When thinking about a tabletop, it was important for us to use handmade elements along with Liberty products during our styling demonstration in-store. Sania, Leslie and I all place extreme importance on personalizing things and the best way to do so is to make things by hand.
In my book, Decorate, there is an entire section devoted to the importance of details. That section, Attention to Detail, begins with an image from Sania's home that was taken for my book at her house. I chose that image to open the section because it really spoke to me. You'll have to locate a copy of Decorate and turn to page 237 to see it and once you do, you'll know exactly why I selected that photo to open the section. A little insider's note... Attention to Detail came to be in the 11th hour and wasn't even mapped out to be IN Decorate but I wanted to include more detail shots that Debi had taken as we traveled so the publisher agreed to it and Attention to Detail was born and I'm so glad it was since many of you have commented that it is your favorite part of the book! But I digress...
But yes, back to our tabletop styling demo and the idea to create a Springy tabletop with pretty details using a combination of products found in Liberty that were already made (like the Lisa Stickley placemats and napkins that we used) along with things from Liberty's fabric + notions department showing customers how to use Liberty patterns in a fresh and new way to create their own products. Sania is very passionate about making things by hand so she was more than happy when I asked if we could take this in a handmade direction. In fact, she was delighted!
For the next tabletop DIY idea, Sania will walk you through how to make gorgeous Flower Napkin Rings using linen (that you can purchase anywhere) and Liberty patterns though you can use any fabrics that you like. Please note that she purchased a very basic, affordable linen since my budget for buying all of these things was pretty low -- but had I done this at home I would have purchased a thicker, more tactile nubby linen to give the flowers more bulk. It's up to you - but bare in the mind the weight of the fabrics determines how the flowers look in the end. You also may need a stronger needle if you use heavier weight fabrics. We used inexpensive cotton linen and lightweight cotton fabric from Liberty.
Let's go to Ms. Pell reporting live from her craft loft in London... Sania, you have the mic girlfriend!
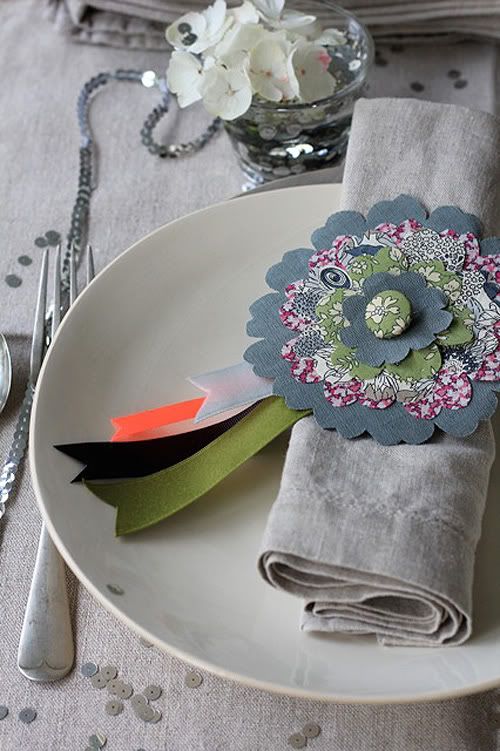
Hi again everyone, it’s Sania Pell here and now I’m going to explain how to make the flower napkin rings used for our table setting at Holly’s Decorate book launch styling demo at Liberty last month.
The wonderful thing about these pretty flower napkin rings is that they have multiple uses. The way they were designed for the table setting was that they would be little favours for each guest to take home with them. As they are simply safety-pinned to the napkin ring, our guests could remove them and pin them to their outfit or bag and take them home with them. A little bit of fun that would make our guests remember their time with us when they were back at home. They can also be pinned onto cushions (pillows) to add detail too. Some were even pinned to the tablecloth along the edges, as you can see if you click here.
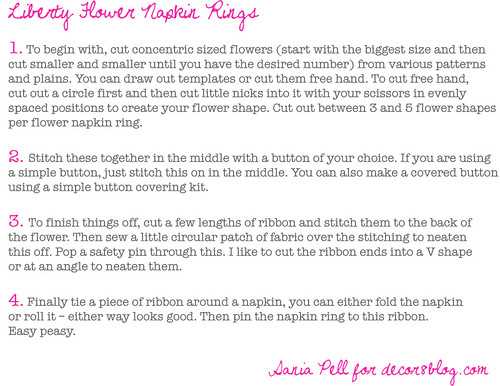
(Click HERE to download XL version of the above steps.)
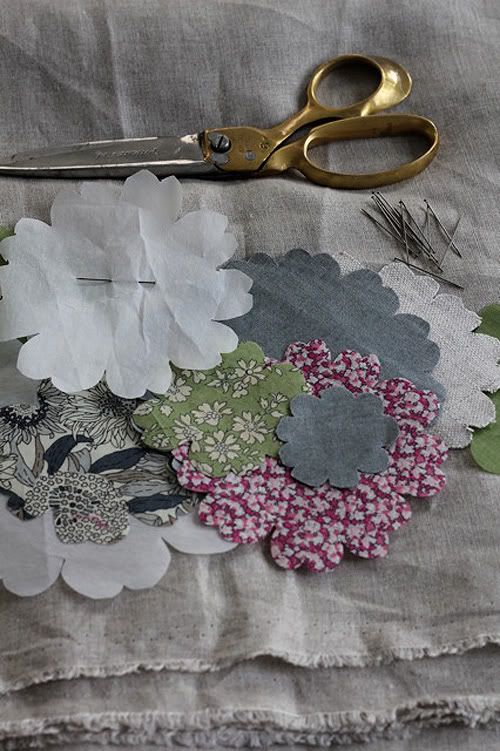
Lay out your cut pieces
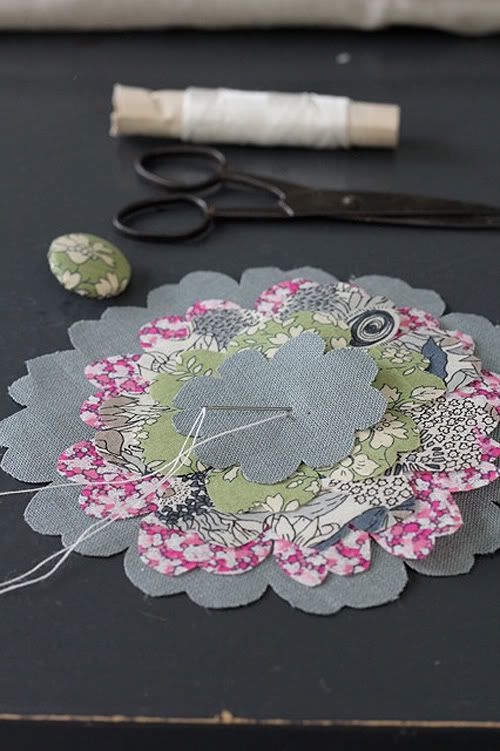
Sew them together in the center by hand.
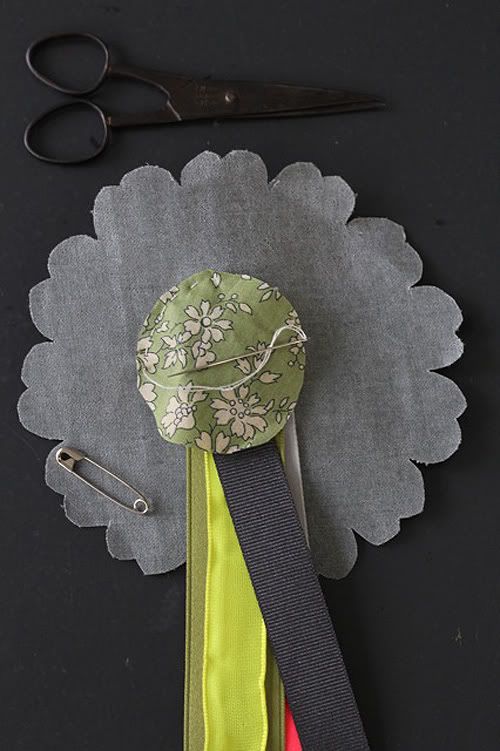
Place safety pin on the back along with ribbons of your choice.
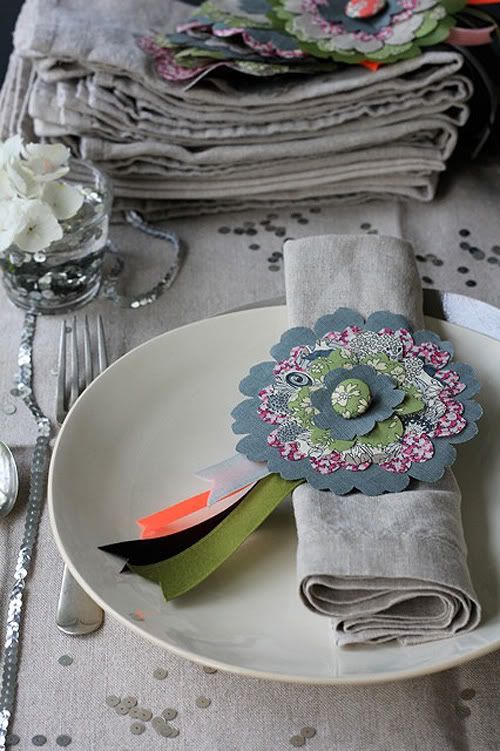
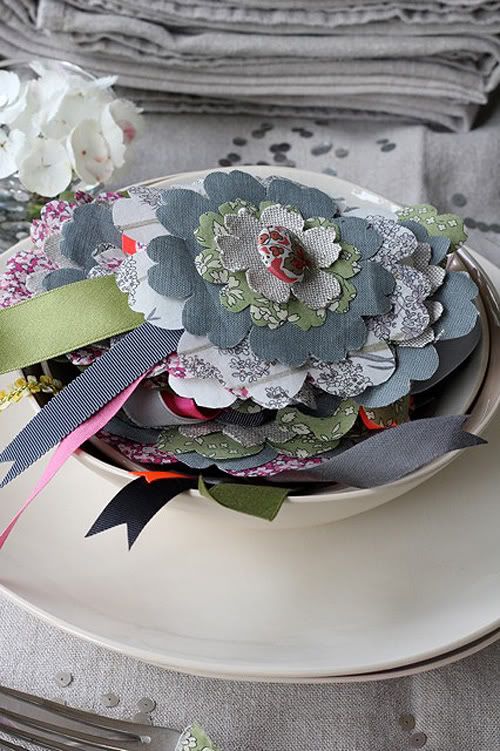
We coordinated these with our overall table setting style for Holly’s book launch, using the Liberty fabrics we had chosen. By using lots of different fabrics and making these by hand you can ensure that each one is unique and individual – something your guests will love and can help be a little ice breaker and conversation starter for your dinner party.
I mentioned in the steps above the idea of creating your own fabric button for the centers of each flower. Covered-button kits are available from most haberdashers, they have little hooks to grip the fabric and a snap-on back to finish it off and keep it neat. They have a loop (shank) on the back for attaching. Here is how you can make them.
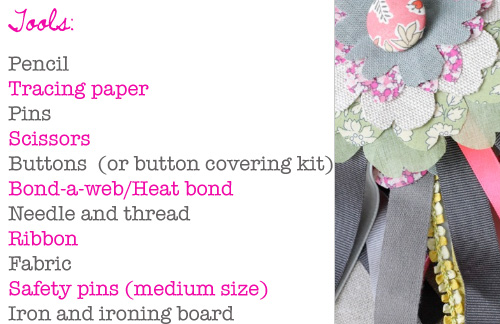
Tools: Button covering kit (buttons can be bought in various sizes and are not too expensive), needle and thread, scissor, scraps of fine/thin fabric and safety pins.
How to: First, you cut out a circle of fabric with a diameter slightly less than twice the diameter of the button. Next, and this is optional, but using a needle and thread you can sew running stitch around the edge of the circle and place the button upside down in the center of the circle and pull the threads together to gather the fabric around the button and knot. Then, snap the back on so it clamps the fabric in place and finishes the button. If your fabric is thick it can be quite difficult to push the back on. A cotton or fine linen works well and finally, if the shank sticks out too far you can push it in so it is flatter to the back.
Ready for a little bonus material before I move on to the final DIY project? Great, here is a mini styling tip for your next dinner party... I call this one Sequin Glamour.
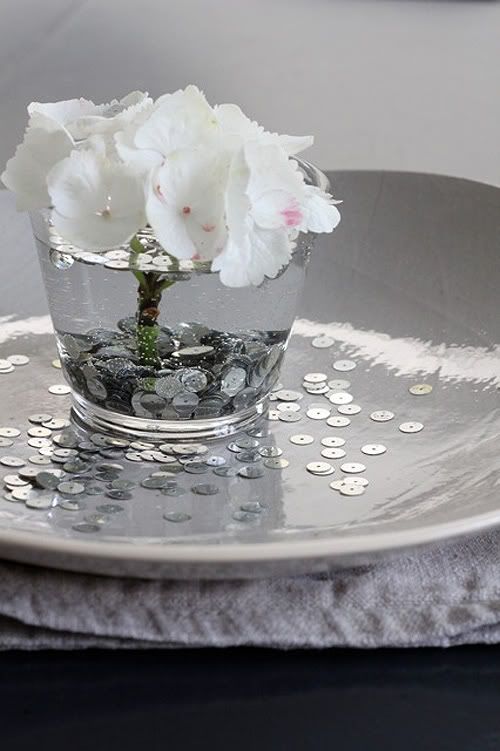
The sequins in the small glass vase, add a little glamour. Some float, some sink, but they are a really easy way to make your table interesting. It is the same with the sequins scattered on the table, they just add a little sparkle, fantastic for a celebration.
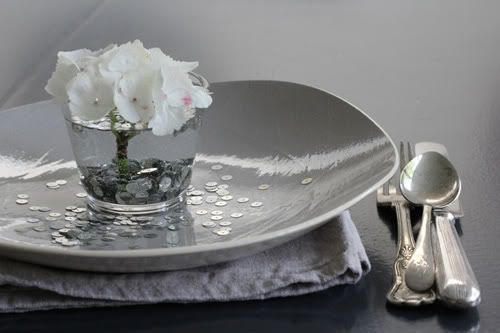
The beautiful handmade plates are by Brickett Davda, the napkins are from Habitat and the little glass vase is actually a tea-light votive from IKEA. The cutlery is vintage from a car boot sale bought for next to nothing. I'll be back in a moment with a final DIY project. Happy making! - Sania x
(images: sania pell)