
Party Decorating DIY
Hello everyone! Are you doing well today? I've been busy working on other projects, including the decor8 blog redesign (very excited to show you the all new site in the Spring!), so my days have been long and filled with much thought. What is best, how should I, is that the right direction, should I try... The many things that pop up that lead me to grabbing my trusty notebook and scribbling down pages of thoughts. Minutes turn into hours and before I know it, another day crossed off of the calendar. But enough about me! I'm here to inspire and energize YOU. :)

I thought today I'd share a little something that I produced for 101 Woonideeen magazine out of The Netherlands. I'm in their February issue (Yay!) and additionally, on their website sharing an easy party decorating DIY. It's in Dutch so here are the instructions in English that I wrote for you below.
Step 1: Lay out all of your materials. You can use paper parasols or round paper lanterns from a shop like IKEA. Both would work nicely. I like to work with odd numbers, so I suggest grouping 3 or 5 above your table (or as many as your little heart desires!). You'll need parasols, ribbon, transparent cord from the craft store, scissors, tags, fabric scraps and screw hooks to put into the ceiling. Next, screw the hooks into the ceiling allowing enough space between them to hang your parasols.
Step 2 : Take your fabric and snip in about 1". The strip should be no more than 2" wide. Once you've cut into the fabric, tear the strip all the way down to the end of the fabric so you have a very rough, torn edge. You can also cut the strips with the scissors if you want a neater look, but I prefer the torn edge. Cut several lengths, just make sure the fabric doesn't hang too long or else it could catch on fire if you have candles on the table! You also don't want the fabric touching the food or your guests. Now cut your ribbons at various lengths.
Step 3: Open and flip your parasol upside down (or your round paper lanterns). Tie your ribbons onto it along with your fabric strips in different lengths. Add pretty tags that you stamp with images that you like or make your own tags with the names of your guests on them. You can attach the tags to the parasol with ribbon, too.
Step 4: Turn the parasol right side up and adjust the ribbons as needed, you may need to snip some of them. Hold the parasol over the table to make sure the ribbon and fabric isn't too long because if you plan to have candles on the table, the whole house may burn down!
Step 5: Tie your strong, transparent cord onto the top of each parasol and then tie securely onto the hooks in the ceiling that you hung earlier.
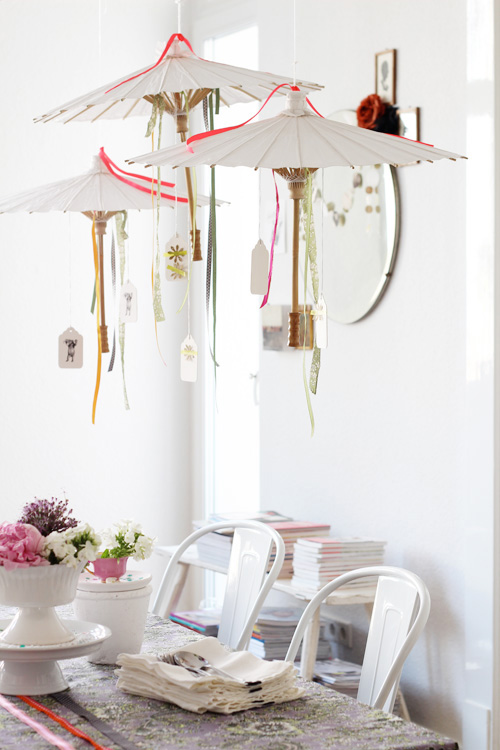
Step 6: Finally, hang all of your parasols and add more ribbons as needed. As mentioned earlier, you can add gift tags or get really creative and add photos of your guests, tiny flowers, hang whatever you would like from them as long as your embellishments are lightweight. I added gift tags to mine that I decorated with Japanese washi tape and at the top of the parasols I added neon pink and orange grosgrain ribbon for an added burst of color.
Isn't this a pretty, inexpensive and simple decorating idea for your next party at home?
Thank you 101 Woonideeen for letting me share this idea with your Dutch readers and for the lovely feature in your magazine. I can't wait to get a copy so that I can see it with my own eyes.
(images: holly becker)