
DIY: Creative Paper Lamps
I'm a regular reader of Danish magazines now, thanks to my neighbor who is in Denmark at least once a week and generously brings them home for me to drool over. One that I really like is called BoligLiv. They recently shared a fun DIY that I simply must show you because these two ideas for round paper lights are both so easy and creative - two of my favorite words when it comes to DIY!
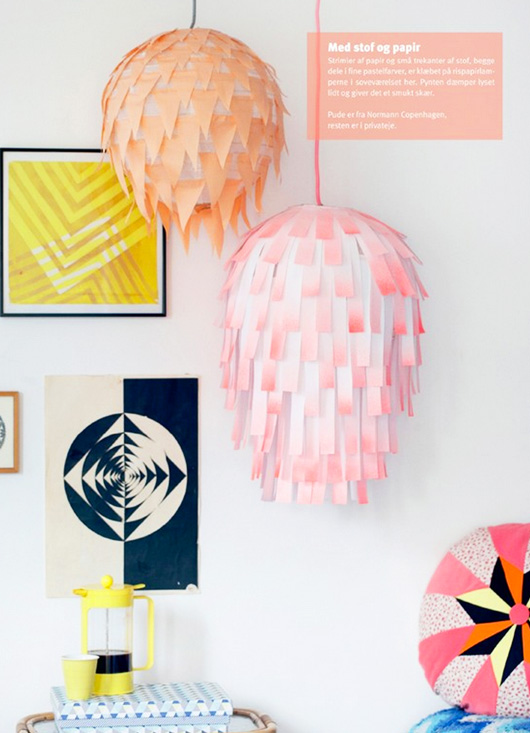
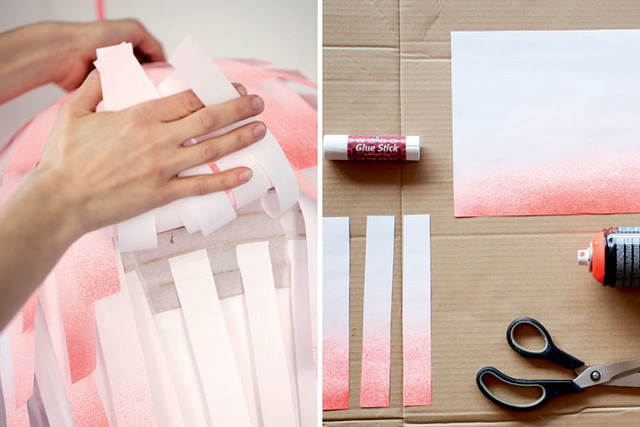
Lamp with paper strips: Get a rice paper orb from IKEA, copy paper, glue stick, spray paint in the color you love and scissors. Now you spray the bottom edge of each sheet of paper and let them dry. Once they are dry, stack multiple layers of the papers together and cut them into 2 and 2.5 cm wide strips. Stack the strips according to length, you will have two piles. Glue the strips individually onto the paper orb keeping some space between each one. Use the longest strips first, starting from the bottom, using your glue stick. Use row after row of strips altnerating between the 2 cm strips and the 2.5 cm strips. Note: Hang the longest strips at the bottom. Full instructions here in Danish.
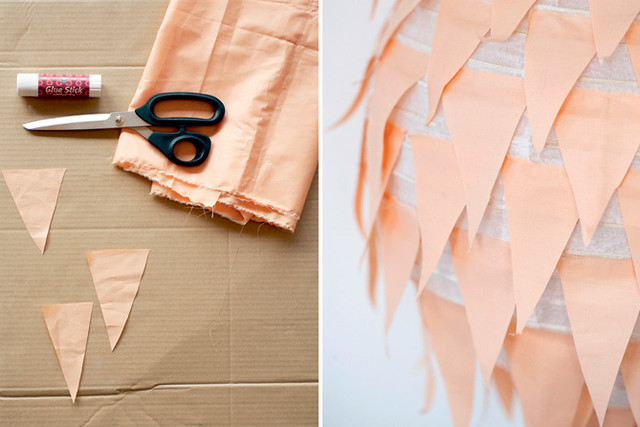
Lamp with fabric triangles: You will need 1 rice paper (Ikea) orb, scrap fabric, glue and scissors. Now you should cut a pair of triangles in two sizes in the fabric. Fold the fabric along a few times, and cut several triangles in two sizes through the layers with the first triangles as templates. Keep the big and the small triangles separated. Glue the triangles from the bottom up. Allow approx. 1 cm between each triangle and about. 2 cm distance between rows so you can still see the lamp between the triangles. Full instructions here in Danish.
What do you think, will you try these DIY projects??? I may because they look fun and I'd love to try using some of my spare Liberty fabrics for a project like this!
(images: boligliv)