
DIY: Fun Frames
Happy Monday everyone and welcome to a new week on decor8. I'm finishing up on the edits for my next book and working on the upcoming Blogging Your Way e-class, in addition to prepping the baby's room and enjoying the fact that today I am officially SIX months pregnant, so I'm a bit bonkers right now! Though I'm a relatively happy bonkers so that's okay I guess. But I do have some bad news...
With the start of my 6th month ALL of my nausea is back and oh my, it's not too fun. Eeeeeek! This is such bad news because I thought I was over it and was ready to do SO MUCH to my home to prep for my baby boy. I had extreme nausea until week 18 (remember when I told you I was severely dehydrated and lost 20 lbs?!) and then poof! It was gone. Like a beautiful miracle. I felt like the happiest person alive. But now, only 6 weeks later, it's back and I'm not so pleased at all. I'm trying so hard to stay positive and focused on the good things and to simply endure it with a smile but it is SO HARD. One thing that helps though is to focus on what I love in life - like decorating and being with my friends - and how much fun it can be to try new things at home. Which leads me to a DIY project that I want to share that I'm calling Fun Frames because really, these were a lot of fun to pull together.
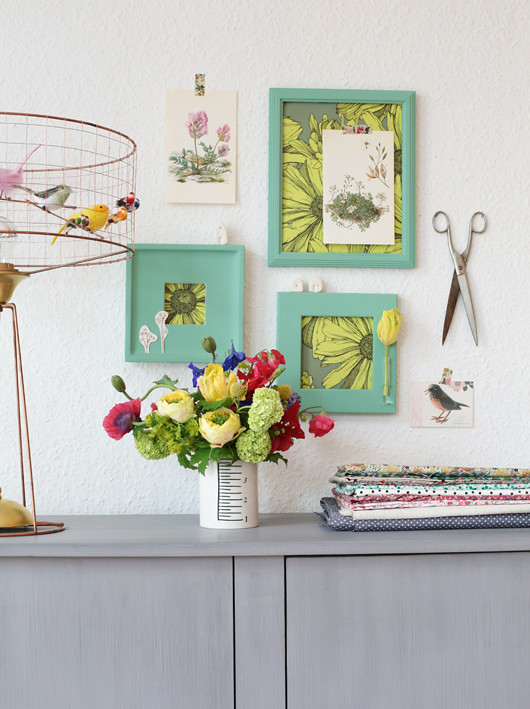
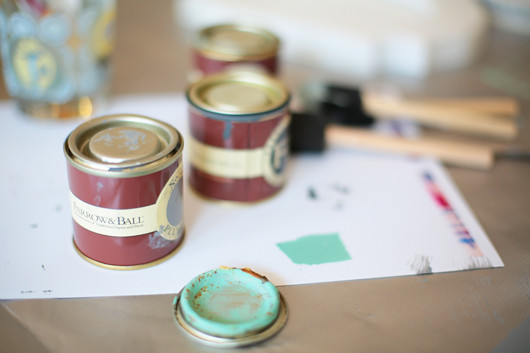
I was feeling bored with having only a mirror above my gray wooden cabinet where I stash all of my fabrics and notions, so I thought I'd bring some pattern and color to the corner through frames and pieces of wallpaper by Abigail Ryan. I think this is a really cute look for a crafty space. Do you remember this post where I debuted her hand-illustrated wallpapers? Well I found a sweet spot for her patterns - inside of simple wooden frames that I painted Arsenic by Farrow & Ball. I'm a huge fan of Farrow & Ball paints, in fact I want to paint the baby's room in one of their gray tones. They cover so well and the matte finish is gorgeous.
Here's what I did:
Step one: I cleaned (soap and water) some frames that I had laying around that were basically collecting dust in my cabinet -- and removed the glass and painted them in Arsenic. I used two coats to make them extra bright and pretty. I let them dry for a day.
Step two: I cut pieces of wallpaper by Abigail Ryan in Cosmo Margarita to fit the frame and taped each piece on the reverse side of the frame. I tried to center the pretty parts of the pattern - you may want to hold them up and mark with a pencil as I did to make sure you are showing the part of the pattern that you want to show.
Step three: Next, I cut some vintage illustrations from a botanicals book that was falling apart and added a few cutouts to the frames - one directly on the pattern in the larger frame and two tiny cut outs on the border of the smallest frame. I wanted to keep the theme of flowers for this look to work with the cosmo print on the papers and the green frames.
Step four: Marking the walls, I decided where to hang my frames and hung them - and I taped a pretty illo to the wall with some Liberty-patterned tape, also in a floral.
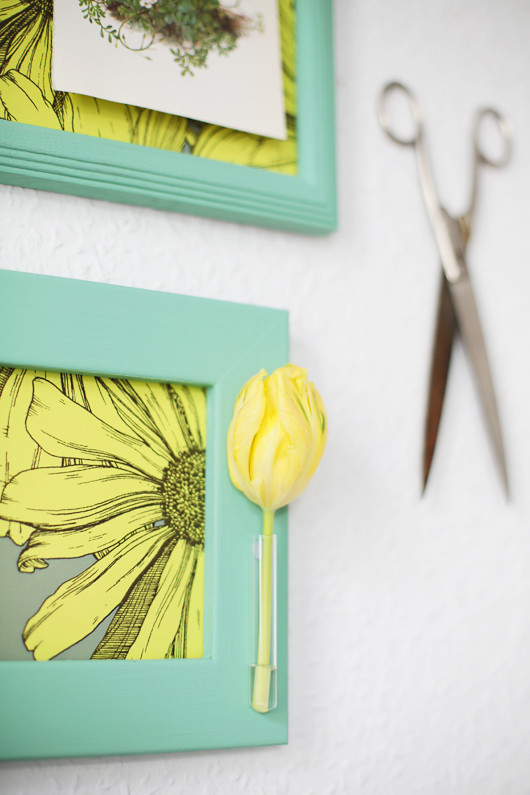
Step five: I decided to add a little vial to the frame border of the medium frame (lower right) that could hold a few drops of water so that I could display a flower - so I popped in a yellow tulip. The vial weighs so little and has stayed on all summer with only a tiny drop of blue tack (which should be in every decorator's tool kit!).
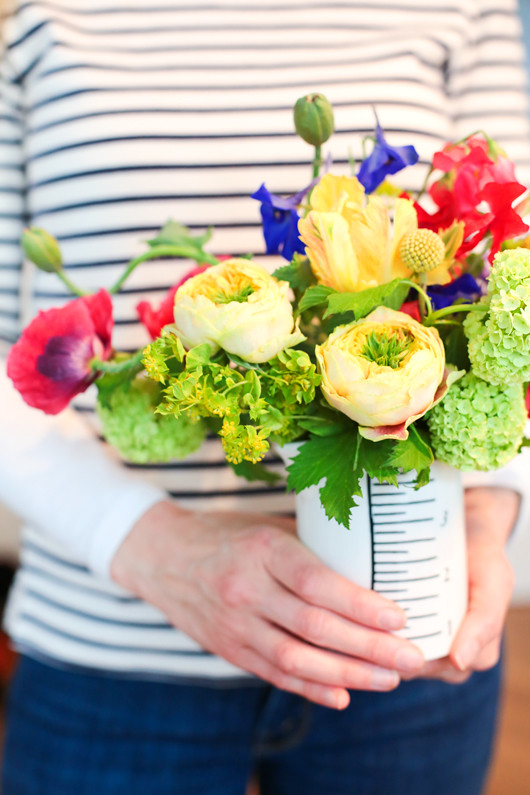
Step six: I made a colorful flower arrangement, which is always a welcome and beautiful touch to every space. I made this one using an assortment of pretty things from the local flower shop that I gathered together that made me happy. Roses, craspedia (aka billy buttons), poppies, tulips, lime hydrangea and sweet peas are among the bunch.

Step seven: The final bit is to always stand back, admire, tweak and then admire again. I added some of my fabrics to the top since the cabinet is stuffed with them, a pair of old scissors from my grandmother and a birdy postcard from Emily. Barb gave me the most adorable ceramic white houses so I put them on the frames since they are chunky enough to double as shelves. Funny thing is, since I shot this - I've already completely changed up this nook (I am rotating things around every 3 months or so), but I still wanted you to see it because it's such a sweet idea. This would work in so many rooms - including a craft room, baby's room, kid's room, etc.
I hope that you enjoyed my little DIY today. I will do more again soon, I love putting them together for you to show you how EASY it is to change up your little corners. Decorating should be fun. Also a big thanks to Leslie for being my model (she is holding the flowers above in her striped shirt). xo
(images: holly becker for decor8)