
DIY: Paper Flower Tabletop Display
Good afternoon everyone! My name is Victoria Hudgins and I'm here today as a guest to share a DIY that I made just for decor8 readers in celebration of my new book, Materially Crafted, which released today! I will show you in this post how to easily make some paper flowers that you can use as a tabletop display or on a wall, as props for a photoshoot, whatever you wish. Paper is such an awesome material to work with because you can form and transform it into just about anything. Nothing says spring like flowers and these paper flowers can be made no matter what the weather is outside. If you have any questions about this project, please ask in the comments section below. Let's get started!

SUPPLIES To make each one of these flowers you will need:
- 3 sheets of scrapbook paper
- 14 gauge metal jewelry wire
- Green wrapping tissue paper
- Small wooden blocks
- 1 cute button
- A drill bit
- Glue and scissors
HOW TO MAKE THE STEMS
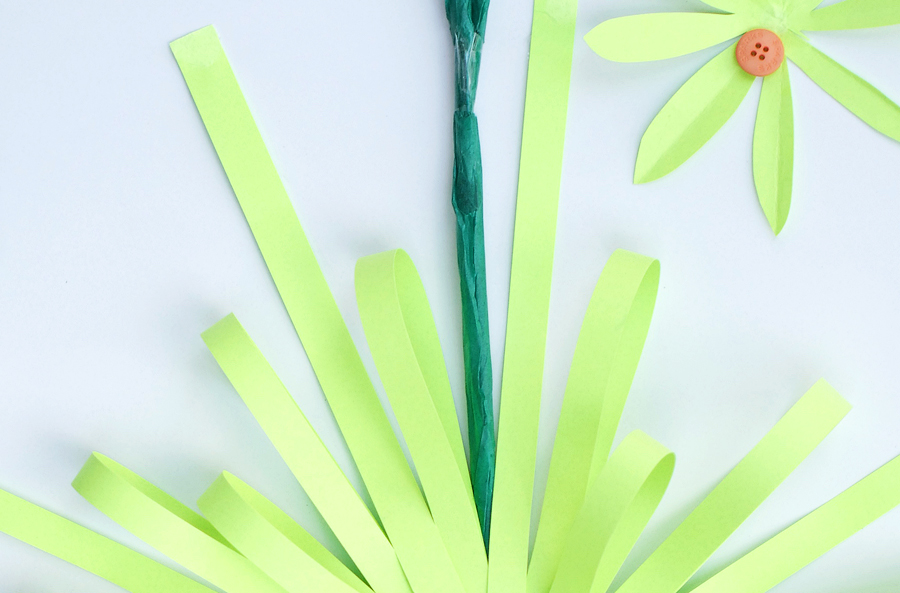
- Cover a length of wire with green tissue paper. Wrap and glue in place.
- Make a leaf for the stem by winding the wire into a leaf form and covering with the tissue paper. Note: Leave about 2 inches of wire sticking out of the leaf to wind around the stem to hold into place.
HOW TO MAKE THE FLOWER HEADS
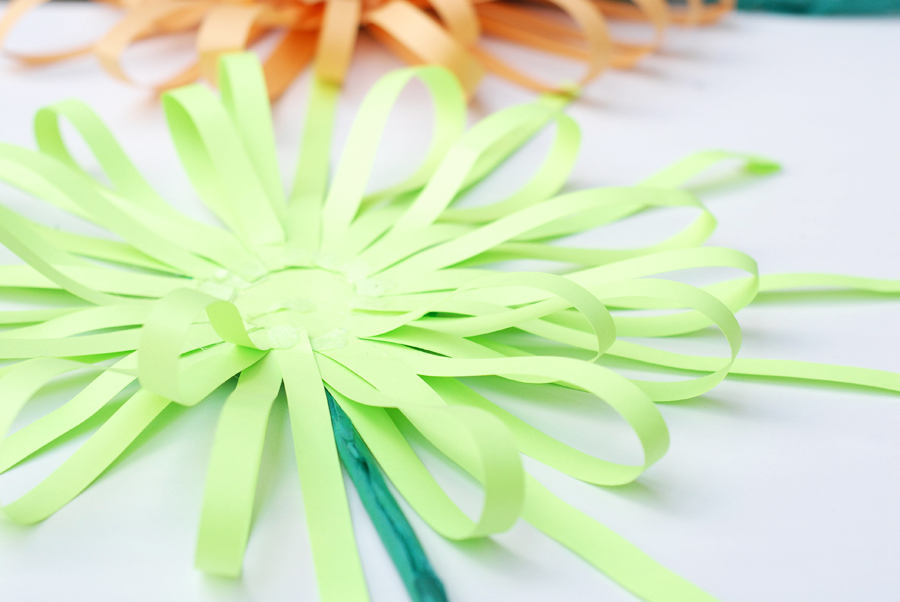
- Cut two sheets of paper into about 3/4 inch strips. Using a paper cutter is easiest, but it can also be done by hand.
- Using the third sheet of paper, cut out two 5 inch circles (one for the front and one for the back) of the flower. Also cut a small flower out of this paper to cover the front section of the flower (image 2 below top right).
- Start with one of the circles lying flat and glue 1/2 the strips around the circle, then fold each upward and glue into place to make the petals.
- Do this a second time on the inside of the first petals to make two rows. This adds dimension and texture.
- Glue the small flower that you cut out onto the top to cover the glue dots and loose ends and glue a button for a fun spring style.
- Put it all together.
- Place the flower front side down and place the top of the stem centered in the back.
- Cover the back with the second circle and glue well into place to hold the flower together.


FINALLY...
- Drill a small hole into a wooden block and insert the bottom of the stem into the block to hold it upright.
- Place flowers around a spring brunch table. Fill with honeycombs, cakes and sweets for a nice way to celebrate the season.
Learning how to work with different materials will enable your crafts to always come out beautifully! That's why I wrote Materially Crafted: A DIY Primer for the Design Obsessed (check out the book trailer here if you'd like!). It's more than a book of projects - it walks you through the how-to's, tips, and tricks for working with so many of the most of common craft materials which can assist you in turning previous DIY fails into future raving successes! - Victoria
(text/images: victoria hudgins)