
DIY: Pure + Natural Spring Mobile
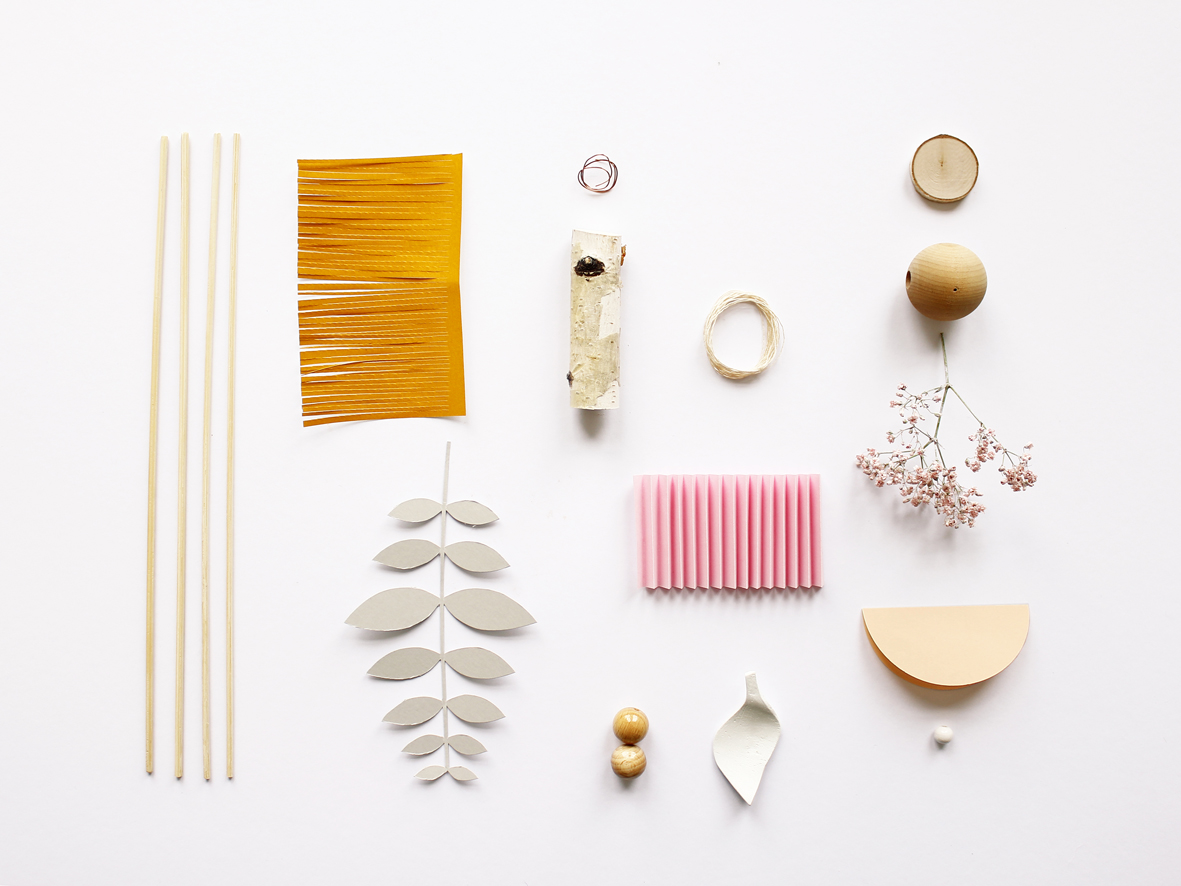
Hi readers, this is Kerstin from Hannover, Germany and I'm really excited about being a member of Holly's team on decor8 going forward. Once a month I will visit you here to share some lovely handcrafts that you can make yourself. Here is my first DIY inspiration for you, I worked on recently and it's a nice welcome project to spring. I love to work with a variety of materials and create some simple, nature-inspired items for home decoration or for yourself in the form of simple jewelry. Today we're going to make the elements shown below in my photo that we will then use to create a mobile. But first...
Sunday was the first day of spring, does it feel that way where you live yet? It's still not feeling like spring yet so I decided to create a light and poetic mobile for you because it is a nice symbol for the season. As the days warm up and the sun is out longer, why not go out and see what you can find from a nearby park, garden, forest or your backyard to use for this project? Nature thrives on opposites, which are brought into harmony – it is the same with my mobile. I decided to use various materials, like finds from nature which include birch branches, stones and blossoms and I've combined with wooden beads and nature-inspired paper cuts - light and heavy, round and angular, rough and soft.
For showing you how easy you can create some of these elements, I made some photos to visually share my steps with you.
MATERIALS: Modeling clay for the leaf (no baking required, I used white) Colored paper Various wooden beads Some veil herb, because it is nice when dried Birch branch Stone Clear stringing wire natural-color thread 4 bamboo skewers 1 glue stick X-ACTO knife hand saw wire wire cutter Cutting mat Bone folder All-purpose scissors Sewing needle
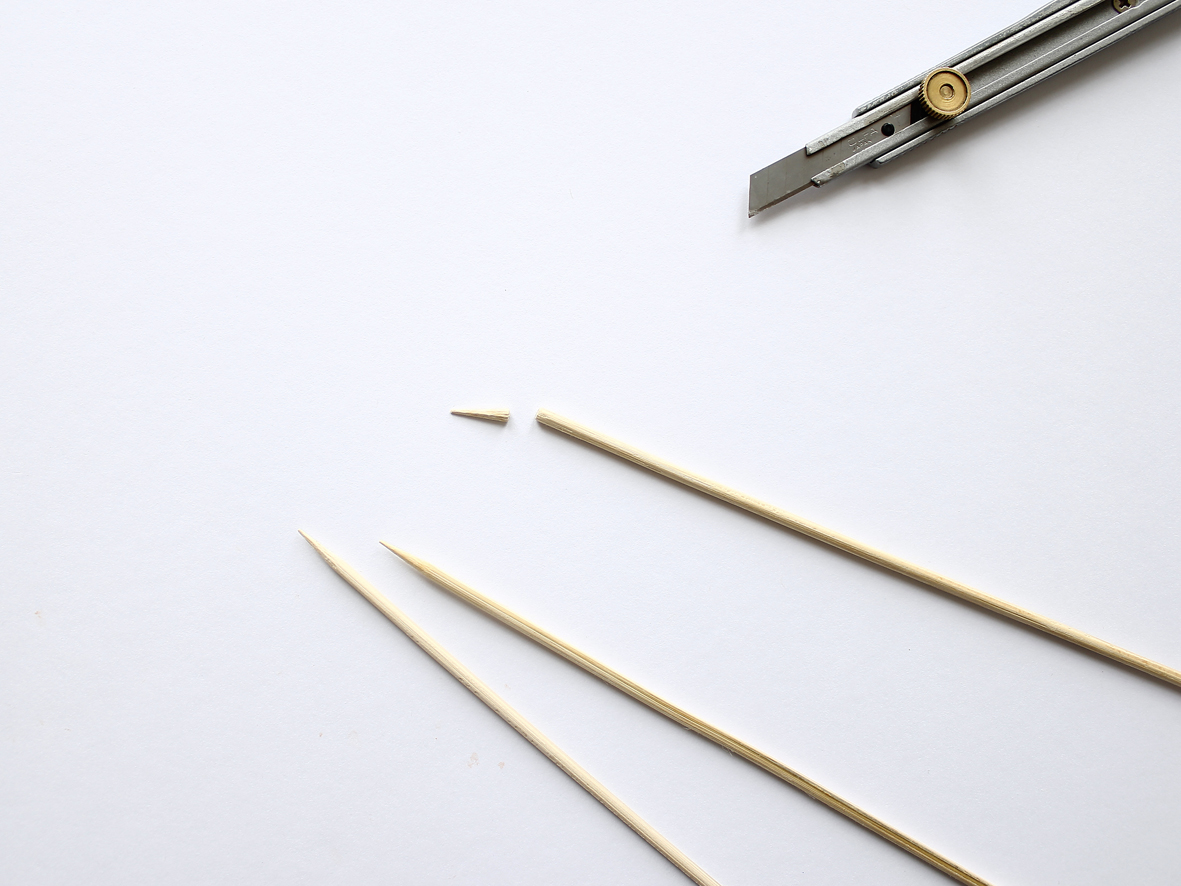
STEP ONE: Trim sharp ends from wooden skewers so they don't pierce you or anyone else! You will use 4 skewers to create a mobile like mine.

STEP TWO: On the skewer at the top, add a fancy end so it looks like a long swizzle stick. Cut a strip of your favorite color paper 2-3" long and cut into the paper but not to the bottom forming lots of thin strips. You most likely learned this in school as a child, right? So I don't need to explain too much. Anyway, wrap the paper around one end, rolling with your fingers as you go, securing with glue to the stick. This is the top of your mobile so set it aside to dry.
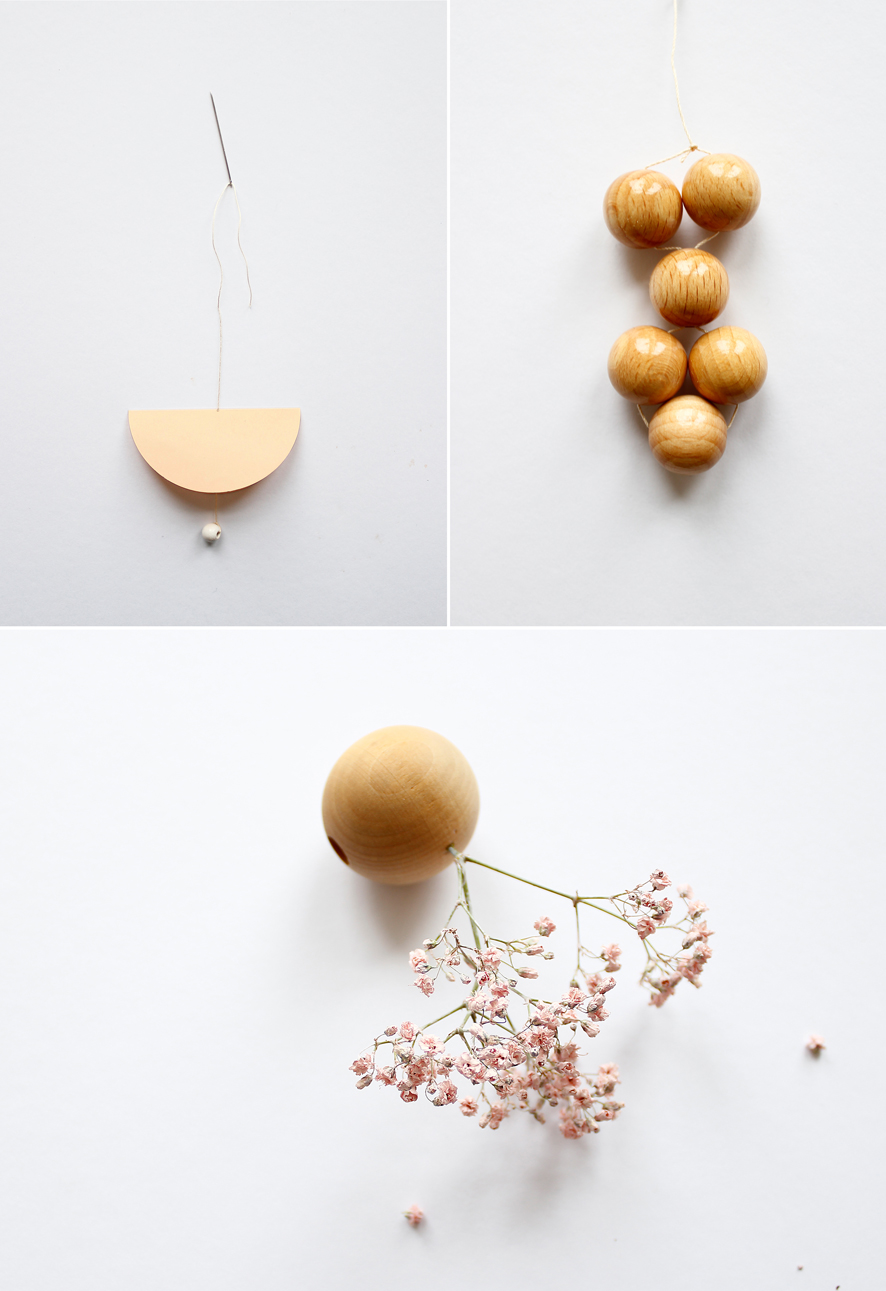
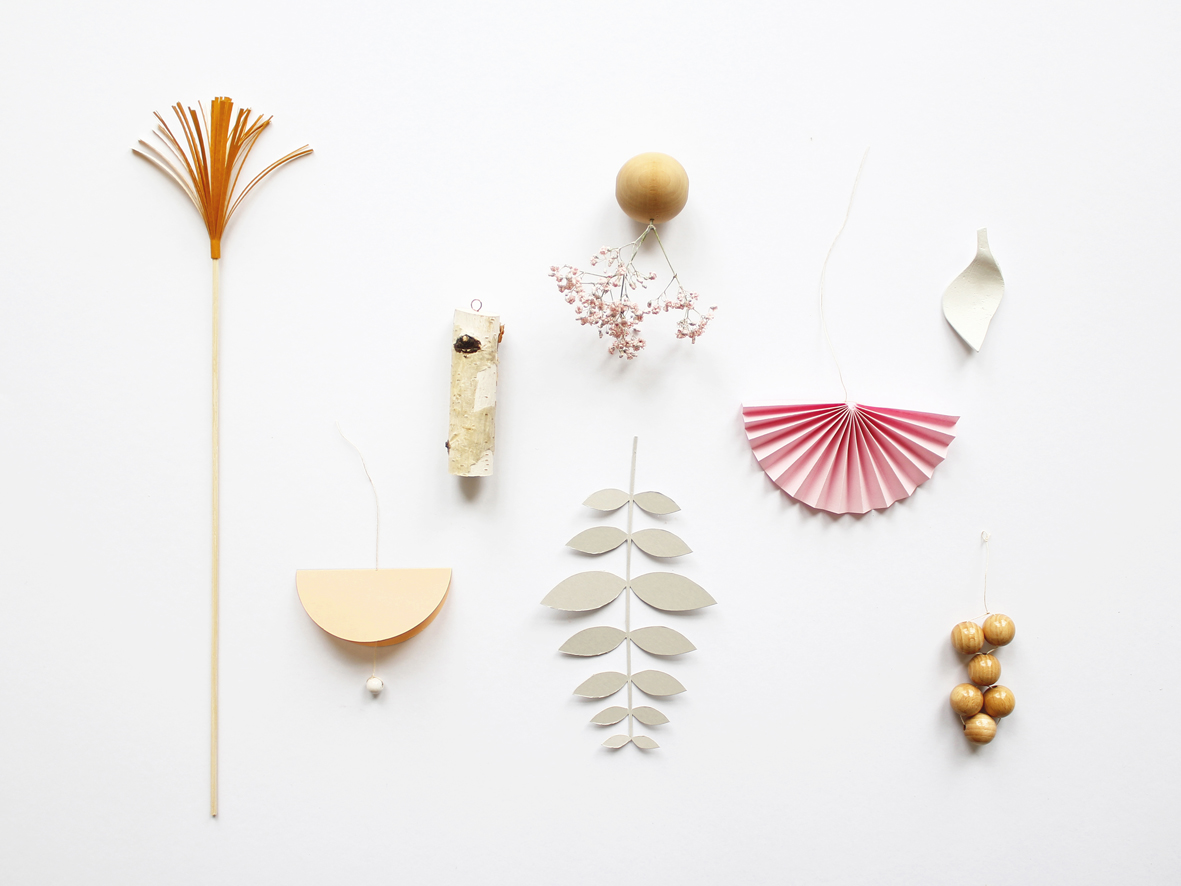
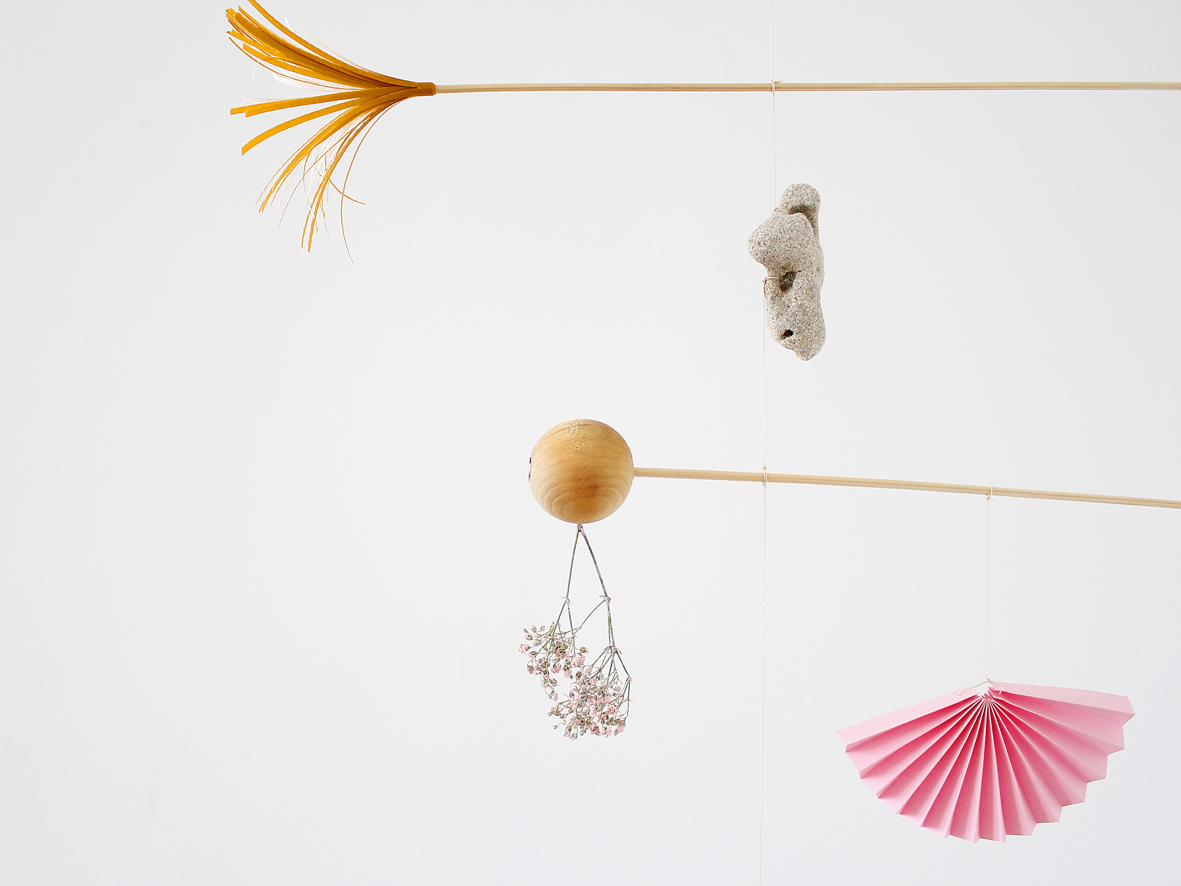
STEP THREE: Quickly make these three elements for your mobile. The first is simply to cut a circle of paper in a color you love and thread through a bead in the center, then fold the circle over to create a half moon shape. Remove the needle, you will eventually tie this element to the mobile. The next element is to use 6 wooden beads and some thread, and simply thread the beads on and then twist to form a shape, then tie at the top. Make any shape you choose. The final element is to take a large wooden bead and glue something natural to it, like dried flower as I did. This bead will eventually be added to the end of the 2nd skewer on your mobile.
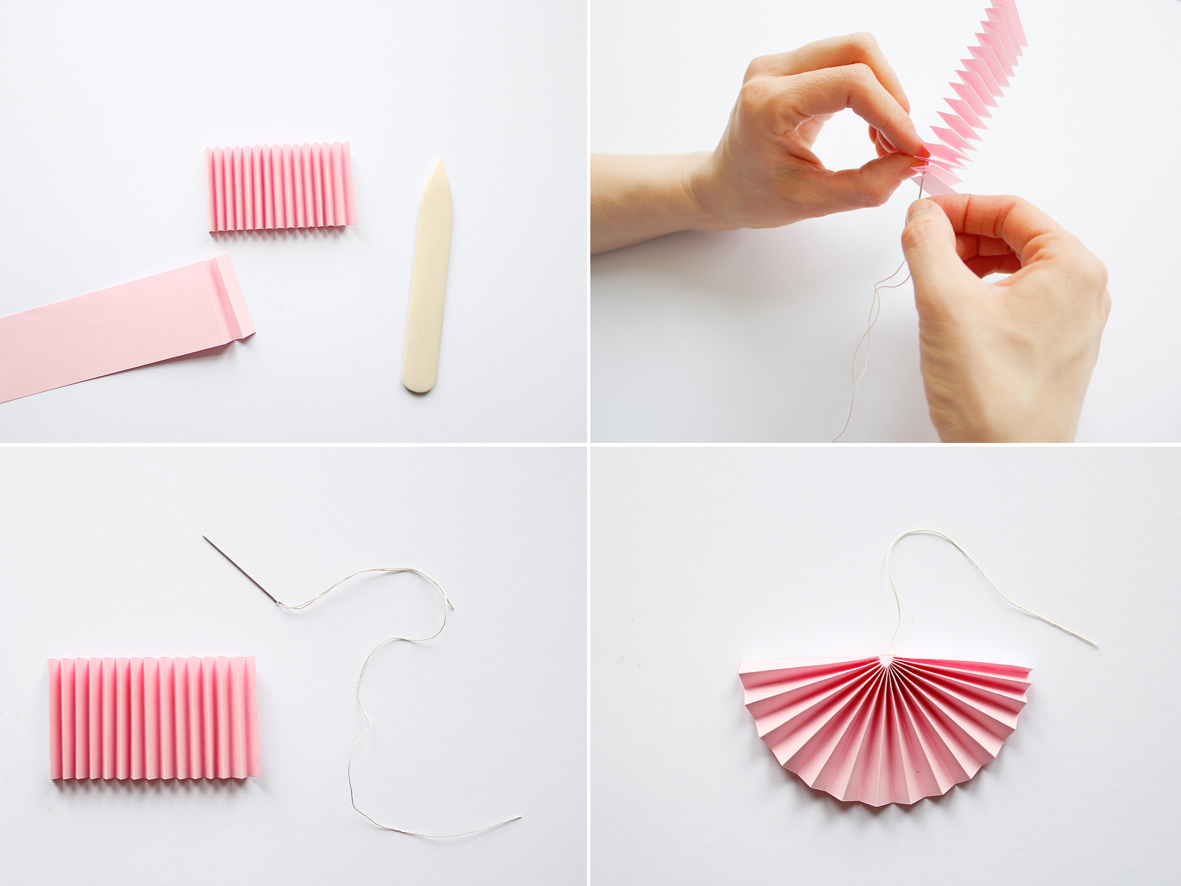
STEP FOUR: I bet you made these in school too, paper fans! All you need is a bone folder for creating the best folds, thread, needled, scissors and paper. These are fun, you can see easily above how to make them so I don't think I need to go into detail! When you finish making one, just set aside for now.
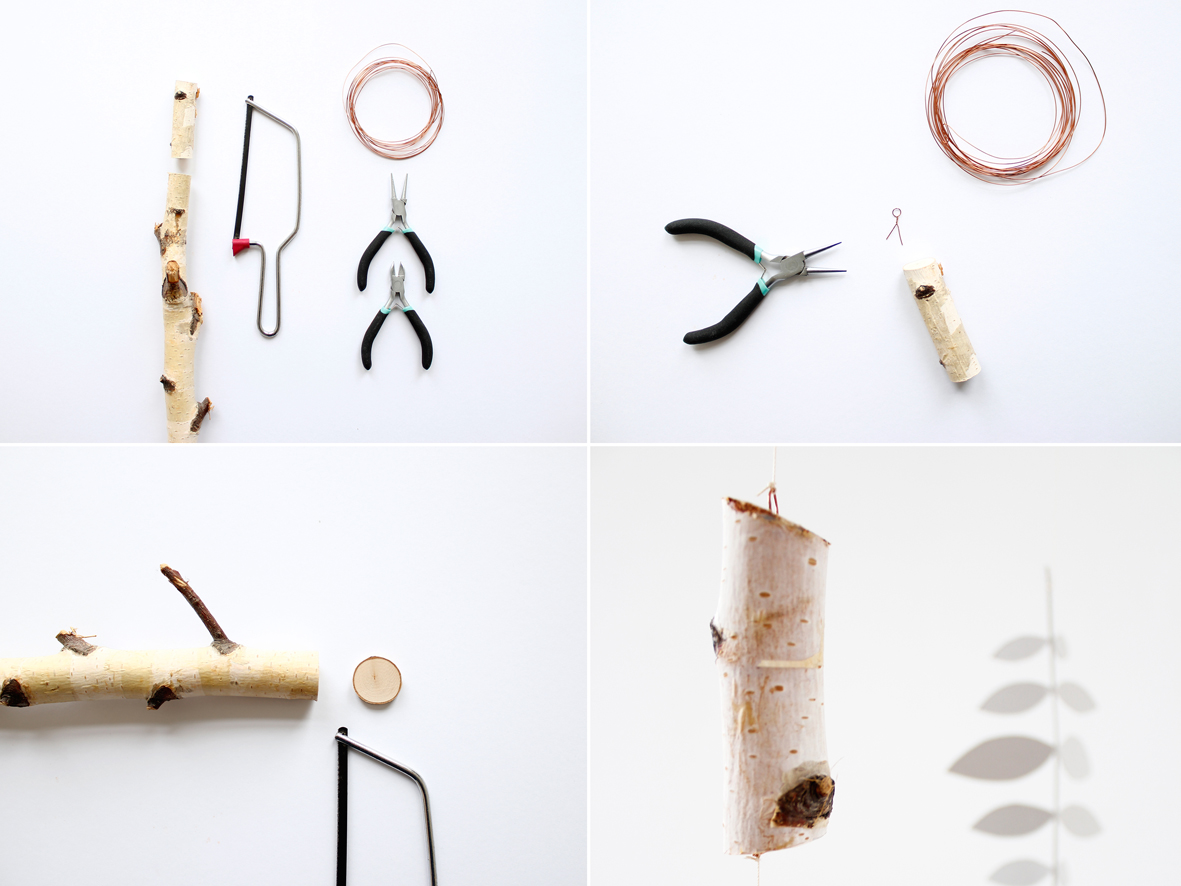
STEP FIVE: Using a found branch and a hand saw, saw off a round disc for one element and for the other, a 2-3" stump. Create looped wire piece you can see in image 2, you need to make two of these. Now, make small holes in the top of your disc element and in the stump element, and insert the ends of the loop pieces into the wood. Use glue stick first to add to end of wire for extra support. Tie thread to each to create two ornaments that you will hang onto your mobile later on.
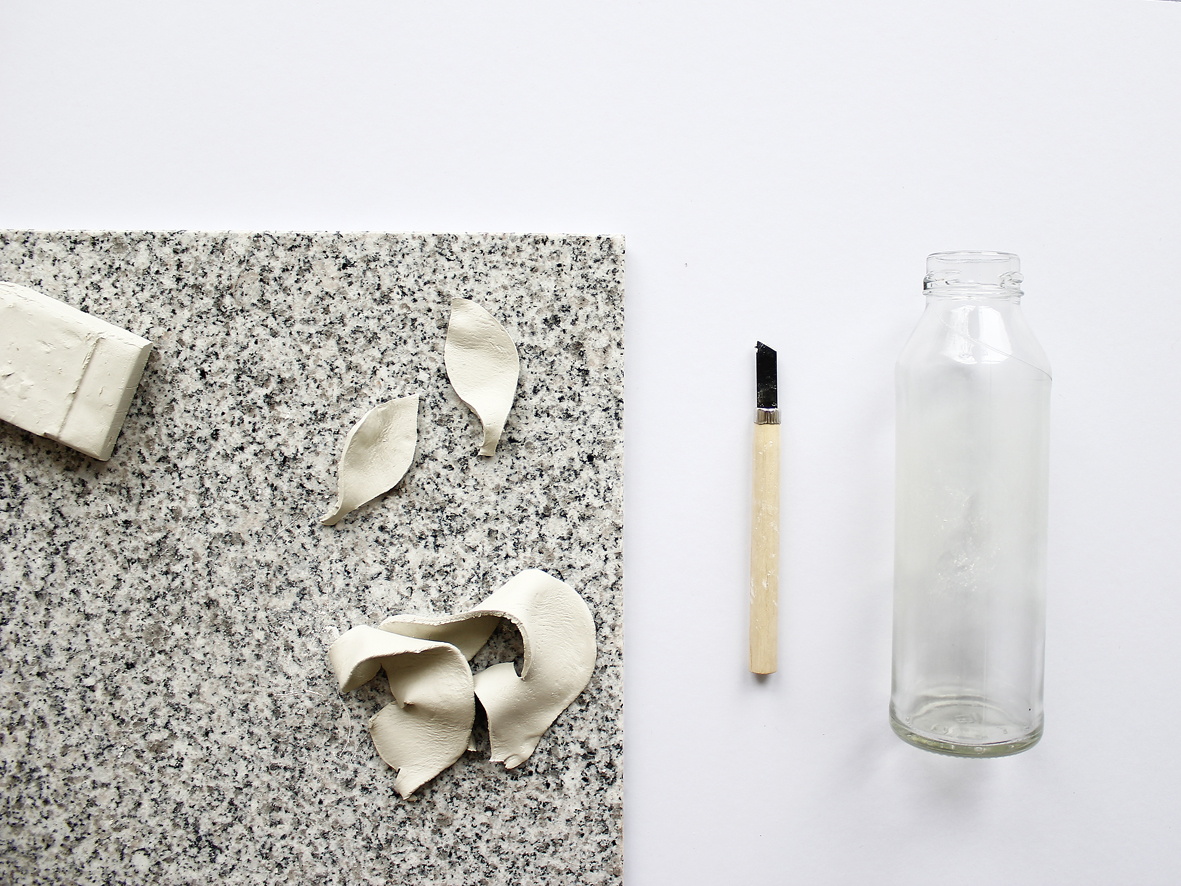
STEP SIX: Create some leaves with your modeling clay using your hands and then lay over a bottle to dry, wrapping them around curve of bottle so they have a natural, curve shape once dry.

STEP SEVEN: Use paper, an X-ACTO knife and a cutting mat to create a leaf pattern like mine. You can use a template if you wish, or free form. It's easiest to first use a template, trace with pencil onto your paper, and then cut shape from there. When finished, place aside.


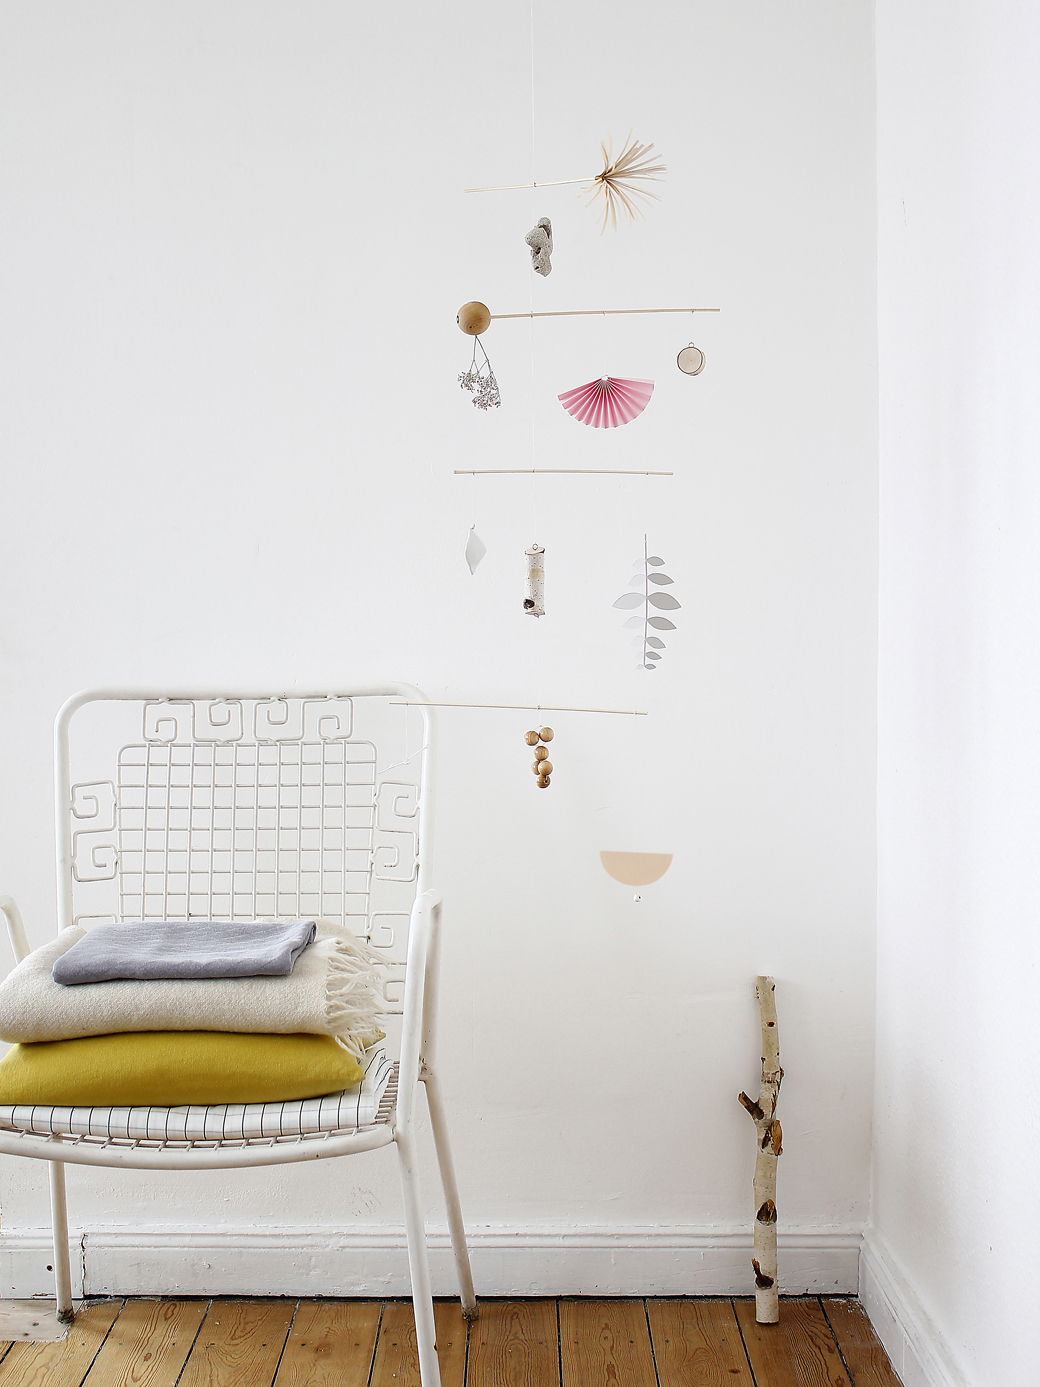
STEP EIGHT: Use clear stringing wire (or strong thread), and begin securing each skewer to the wire (or thread). I used one long piece of wire and tied to the first skewer, then the second, then the third, then the fourth, leaving some skewers off center. As you tie your elements to each skewer, pay attention to how well everything is balancing out so that the mobile is straight and not lopsided.
By choosing my elements, shapes and colors carefully, creating this mobile was more than just craftwork. It was a relaxing and enjoyable project; I loved to watch it grow by slowly testing out various combinations. During my experimental work, I love to play some good music and drink a good cup of coffee. Do you? I hope I will inspire you to do the same, no matter if your mobile or decorative wall hanger will look like my example or show your personal style, that's up to you.
Let me know if you have any questions, you can ask me in English or German in the comments section below. Thank you for having me for my first column today, readers! I'll be back in April with another pure and nature DIY idea for your home! - Kerstin.
(Photography, Styling, Concept, Text: Kerstin Reilemann/ Editor, DIY Text: Holly Becker)