
Liberty Fabric Wrapped Lampshade Tips + Styling Ideas
The next DIY that we've prepared to you taken from an idea to make a funky lampshade that we've called the Liberty Fabric Wrapped Lampshade because Liberty fabrics were used to make it that were selected in-store. I'm proud of this one because we had a really fun time trying to figure out what to put over the table (see table here) and at first I had envisioned stripped and wrapping three rice paper lanterns from IKEA in Liberty fabric then hanging handmade garlands from the bottom of their frames but then I thought that having IKEA products in Liberty may not be the best idea! So my friend Sania Pell and I thought to try something else -- perhaps something vintage and affordable to inspire our guests, and as our ideas evolved a wrapped fabric lampshade was born. I love the evolution of ideas, collaborating with others, and pushing the envelope when it comes to ideas. This is a quirky shade, but it's fun and totally worth trying at home.
Sania made the one shown in this post to hang over our table at Liberty that we, along with Leslie Shewring, showed during my book launch party. So! Sania is back with a little inspiration for us again -- this time, the fabric wrapped lampshade. You're up, Sania!
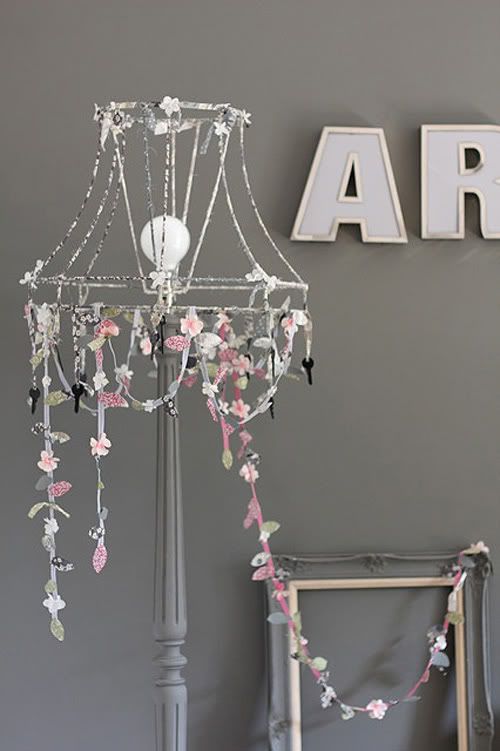
Hello it's me Sania again! This lampshade is the one we used at the Liberty demo suspended as a centrepiece over the table, with a mirror ball for a bulb and draped with the garlands and ribbons. Holly showed you how to make a similar version here so I won’t go into too much detail for this DIY since she covered it already. But I will give you some styling tips in case you're wondering how to fit this type of shade into your own decor or at a party.
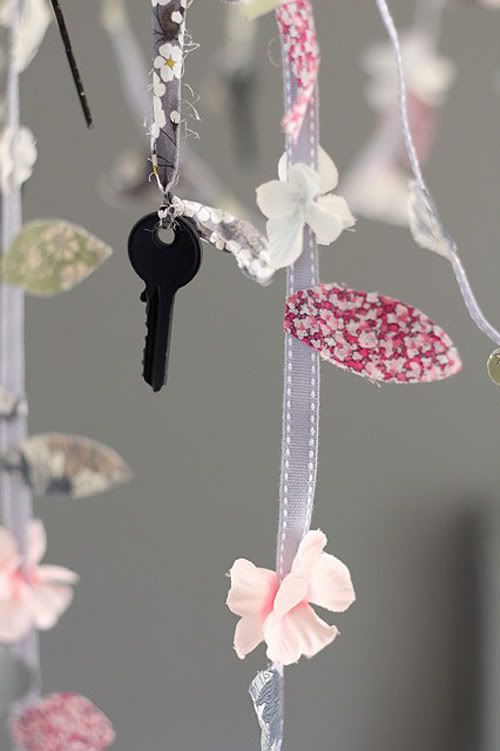
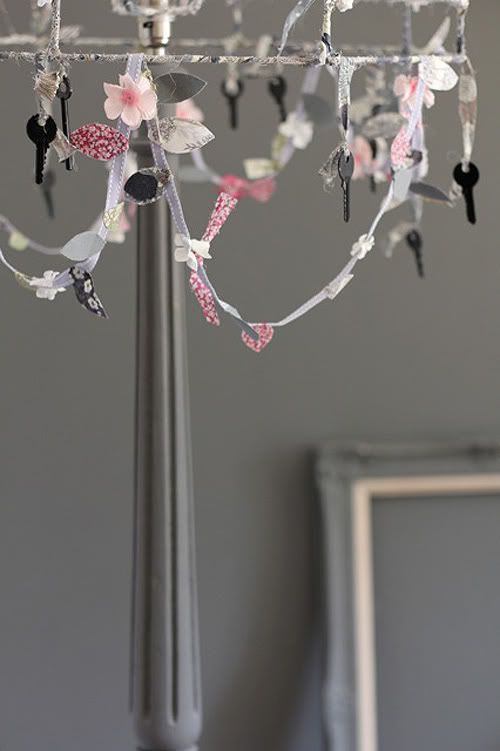
* Use several different patterned fabrics but all from the same colour palette. * Double-sided sticky tape at the top and bottom of each wire rod helps attach the fabric quickly and easily. * Knot the fabric strip when you get to the end of a rod, leaving little tabs and swatches of the fabric pattern sticking out. I consciously embraced the fraying edges as part of the overall look. * For this shade, strips of fabric left hanging down with old (not antique) keys tied to them spray painted black formed a link with Decorate – which is a book about beautiful homes. You could try something similar, but with objects that you love. * To finish it, add small silk flowers to varying places on the frame to provide a visual connection with the garlands (how to make the garlands here) and to add some detail.
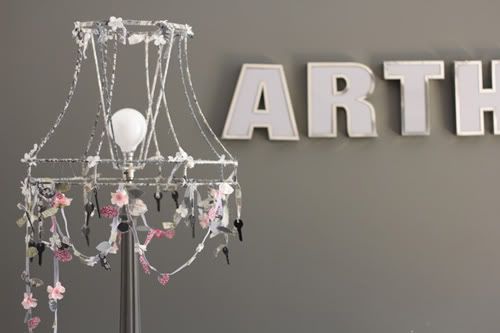
I thought you might also be interested in how I styled these photos. I used a lamp base, picture frame and wall all in a similar dark grey – one of my favourite colours – to ensure the pattern and colour of the leaves and the shade pop out in the pictures. The common element in all the Liberty fabrics we choose was that there was a subtle grey link between them so I know this colour scheme would work. It would look good against white too, prettier but less dramatic. I purposely chose to display the garlands on the graphic letters on my wall as a contrast against their organic shapes and softness. I also used my big mirror ball to reference the one we used at the demo, to add a bit of glamour and to pick up on the silvers and greys of the other props.
ll the props in these photos cost hardly anything, they were just painted, cleaned or customised. The lampshade came from a charity shop, the lamp stand, frame and mirror ball were from car boot sales, and we spotted the metal letters being thrown away when an old office building was having a new sign installed. We asked the builders and they let us have them for nothing. Hopefully it shows with some creative thinking and a little bit of effort you can create something stylish and personal for next to nothing.
I hope you’ve enjoyed this project and that it has inspired you to try something new. If you have any queries about this project please put them in the comments and I’ll help if I can! In my next post I’ll be telling you how to make the hanging house mobiles we had suspended above Holly’s signing table. Thank you for reading and happy making! - Sania.
Caution: Fabric near a bulb should always be treated with a flame retardant spray. As this was just a display shade it wasn’t necessary, but I will either treat it before use or unravel the area nearest the bulb to be on the safe side.
(images: sania pell)